

Splicing and repairing a belt: what makes a joint last
Hot and cold vulcanized splices against mechanical fasteners, and the working habits behind a long-lived splice.
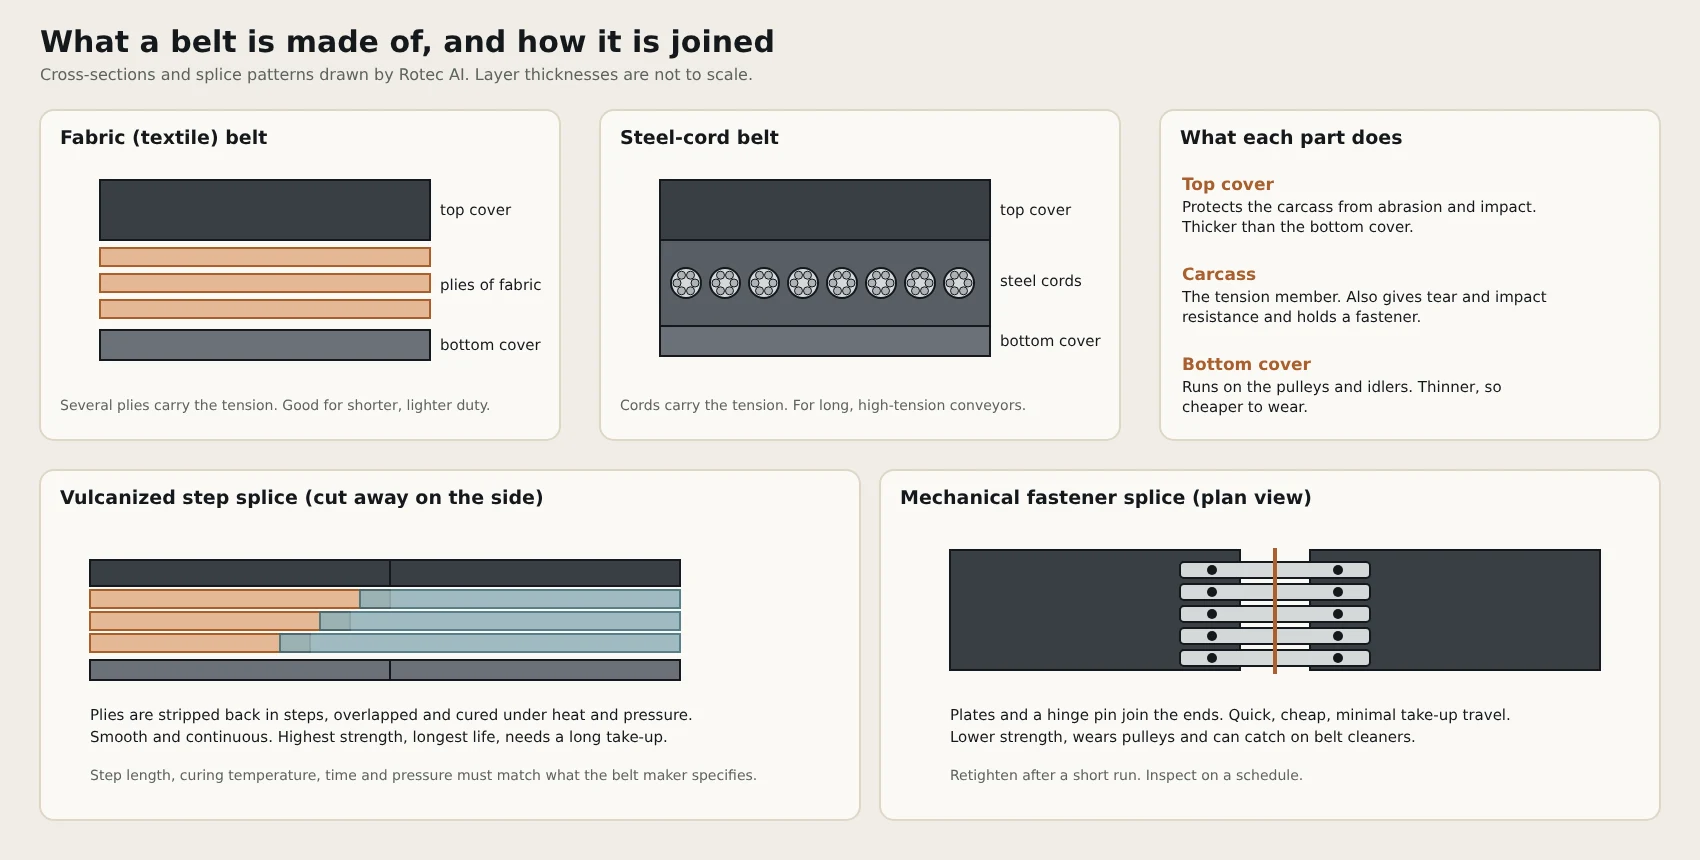
Choosing a splice
| Vulcanized splice | Mechanical fastener | |
|---|---|---|
| Strength | Highest practical strength | Lower |
| Life | Long, often the life of the belt | Shorter, needs inspection |
| Surface | Smooth and continuous; material cannot seep through | Can damage or catch on belt cleaners; wears pulleys |
| Take-up travel | Long take-up needed | Small take-up travel is enough |
| Cost and time | Higher first cost, slow to renew | Quick, hand tools |
| Cure method | Hot press or cold bonding | None |
Ten habits of a good vulcanized splice
- Control the cure: record the temperature, time and pressure, and measure temperature at the platen and belt interface with at least one thermocouple per platen. A thermostat on the machine does not show the true temperature.
- Strip the belt with proper single-ply knives so the plies next to the cut are not nicked. A nicked ply lowers the tension rating.
- Buff rubber only, never the fabric. Keep the buffer to a limited speed (about 2,000 rpm or less), so fabric and its adhesive coat are not removed.
- Let cements and solvents dry completely before assembly. Test with the back of a finger, not the palm. Wet cement vaporises under heat and causes blisters in the plies and cover. Let cold materials come up to room temperature first.
- Lift plies with smooth, rounded tools and check them for burrs. Do not over-prod the fabric.
- Use the step, finger and bias lengths the manufacturer specifies. Shortening a step to fit a small press weakens the splice.
- Keep the work area clean and covered. Tools, dust, sand and insects have all been found inside failed splices.
- Never use out-of-date cement or gum. If in doubt, throw it out.
- Use only the splice materials specified for that belt.
- Square the splice. An out-of-square splice causes tracking trouble and loads the splice unevenly.
Repairing steel-cord belts
If the damage is only in the rubber, clean and dry it, replace the damaged layers and cure the repair. If cords are exposed, use the proper cord cement and insulation gum. If less than about 5% of the cords at the edge, or 10% in the centre, are damaged, new cord sections can be worked in, extending about 380 to 600 mm each side of the break. Beyond that, resplice the belt. Take the tension off the belt first when repairing edge cords.
Cover blisters
A small cut or puncture can let fines work under the cover and spread between cover and carcass. Repair cuts early with a vulcanized spot repair or a self-curing repair. Spilled oil or grease from over-lubricated idlers can also make covers swell and blister.